8 Search Results

For the term "blender".
Ton Roosendaal, Blender philosophy 0

Ton Roosendaal, Blender philosophy

Being my professional workhose since 2007, I have been naturally promoting Autodesk Maya on this blog, with some occasional foreays into Blender when enraged at the price of Maya’s license/subscriptions, then back to Maya when Autodesk introduced the free “Maya and Autodesk softwares for Displaced professionals” back in 2012. to support professionals during challenging times.

That scheme gradually disappeared without much noise and recently Autodesk introduced various options on top of the classic educational subscriptions.

Currently, you can get Maya LT, a 300 dollars a year cut down version of Maya that unfortunately doesn’t allow you to run most of the free animation rigs available on the market so for animators who want to focus on character performance this is a no-go. Python is not available either when everybody in the industry uses Python and scripts like AnimBot or any Phython scripts won’t run on it. Rendering is not possible, dynamics are not available, referencing is missing….

Then in some selected countries, you might have access to Maya Indy which is the full feature Maya, for “artists earning under $100,000/year in revenue.” This would perfectly cover hobbyist living in those 5 countries if only there wasn’t a catch! So what is the catch? The catch is, that this scheme is only valid for … one year .. then your subscriptions automatically gets renewed at 250 a month πŸ˜‰

With my inclination for education and support for struggling populations in the light of the murder of George Floyd, I just can’t continue predominantly posting articles related to Maya.

“Learning 3d at home is a way for modest populations and kids, to potentially gain access to employment and revenue streams”

Learning 3d at home is a way for modest populations and kids, to potentially gain access to employment and revenue streams, outside of expensive institutions and without incurring lifetime debts or adopting piracy habits.

Sorry, that’s a long winded introduction to finally explain that I will start covering Blender more and more on this blog πŸ˜‰

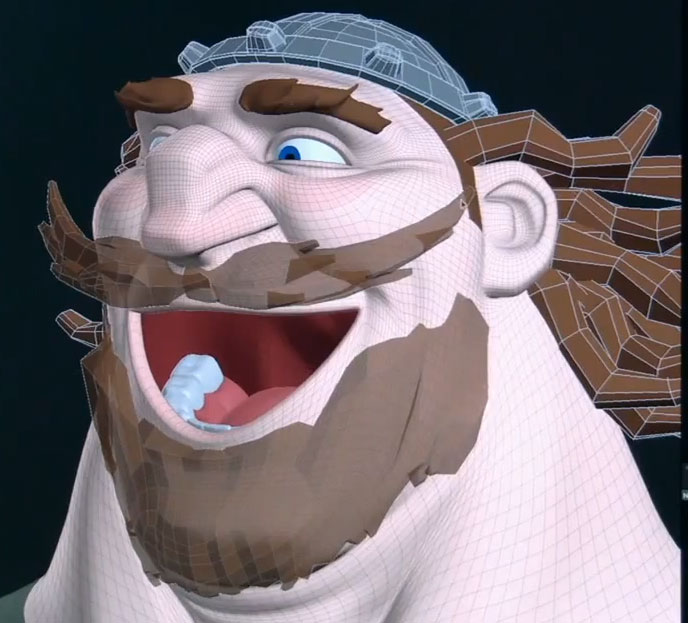
This first Blender post is a two years old video but a major one as Blender founder Ton Roosendaal, will cover the history of Blender, its philosophy, and its challenges with some interesting comparison with Autodesk and Zbrush.

I never dug too deep into Blender in the past as the interface and the Right Mouse Button (RMB) slection really annoyed me. Unlike some other software creators (TV Paint, Zbrush…), they realised that they shouldn’t force users to their philosophy and accept that some user interaction have now become standard, the left mouse click (LMB) for selection for example.

There are plenty of interesting bits in that video and 1 hour into it, Ton reckons there are just below 20/35k paying Maya customers and less that 20 developers working on it. This could explain why we get so many half baked features every releases and makes me wonder how many companies might be using pirate copies.

If you are in a hurry, Andrew Price was nice enough to include timecodes in the video description.

Enjoy

Related posts:

http://www.olivier-ladeuix.com/blog/2010/01/28/tachaaan-short-film/
http://www.olivier-ladeuix.com/blog/2011/08/07/blender-sculpting-tool/
http://www.olivier-ladeuix.com/blog/2011/10/10/this-is-what-you-need-blocking/
http://www.olivier-ladeuix.com/blog/2011/08/06/blender-grease-pencil/
Blender Sculpting tool 5

Blender Sculpting tool

If you ever wanted to try Zbrush but couldn’t afford it or were just put off by the interface, don’t despair! Blender comes to the rescue again!

Here are two really cool videos where you will be able to witness how awesome Blender, a FREE software is! This time you won’t have to listen to my silly comments or watch me looking for tools as a master modeler/sculptor will take you on a tour.

The first video is a sped up version of the second video, a teaser if you like. The second video is a 1h30 mins long sculpting walkthrough were you will be able to follow Roberto Roch and watch him work in realtime. Check this out, they are both in 720p!!!

[youtube]http://www.youtube.com/watch?v=7fxpQTO7f_w[/youtube]
[youtube]http://www.youtube.com/watch?v=B1DaPSV7isg[/youtube]

Blender Grease pencil 8

Blender Grease pencil

Even if you are a regular Maya, 3dsmax or XSI user, I think you should check out the following videos as I am sure you will be able to find a use for Blender pretty fancy tools.

The first one I want to demonstrate today is the Grease Pencil, a nice feature that allows you to draw on the 3d viewport and write notes but also make quick thumbnails animation! Sorry for the low framerate, I realised it too late but will record an other animation example very soon.

As you will quickly realise, I don’t have much experience with Blender but I keep wanting to discover more, remember Blender is a free software and the developers keep updating it to make it more user friendly. Version 2.5 has integrated a lot of improvements and the software will get better and better from that point.

Towards the end of the first video I am getting a bit lost trying to find how to enable the Audio Scrubbing so feel free to jump to the second add-on video so I can avoid embarrassment πŸ˜‰

[vimeo]http://vimeo.com/27356629[/vimeo]

[vimeo]http://vimeo.com/27358427[/vimeo]

To Blender experts reading this, how would you go about exporting the grease pencil notes/sketches to a video or even just an image sequence automatically?

So far I have two techniques that are not very user friendly but at least they work and will generate an image sequence which you can import into any 3d or editing software:

1. use a software like IrfanView to take a screenshot automatically every second and manually jump from frame to frame
Quickscreenshots might be an other simple alternative with an incremental saving hotkey CTRL + ALT + w http://code.google.com/p/quickscreenshots/

2. use the Blender Screendump function. Press CTRL + F3, press the + key to increment the file name and press Enter to Save.

[update thanks to Ljoel] Forget about all that exporting nonsense above, the solution is to use the OpenGLviewport capture πŸ˜‰ Here is where you will find it

Technically inclined animators 0

Technically inclined animators

Yes animators can switch 3d software after a bit of training but there is no way an animator can be proficient in Maya, 3dsmax, AND Blender, when I would highly recommend to gain software specific knowledge, especially if you work in a small production or at a studio with no animation production experience.

Back in 2014, I joined Doodle Productions for the production of “Messy the Monster” season 01.

The company came from Architecture 3d visualisation so we had to use 3dsmax when most animators were Maya users. It didn’t take too long for the animators to get acquainted with 3dsmax as we used regular Euler based rigs and not 3dsmax’s proprietary “Character studio” (“biped”).

One issue we faced though, was the fact that we only had one rigger so it was close to impossible to get additional features and after all, there is no way a character TD can anticipate all the needs of the animators. Most of the time, I wouldn’t even bother and added the missing features myself.

In the following shot, the prop had absolutely no rig. I went ahead and added a bend deformer to make the motion of the trumpet look a bit more smooth, and a “lattice” deformer to visually convey the sound of the trumpet.

On that show, “Messy”, the main character, had two fluffy ears and a massive tail with no dynamics. At a quota of 6 to 8 seconds a day in 3dsmax, most animators gave up on animating those appendages which looked very jarring. Instead, the most technically inclined animators started using a script to simulate dynamics as we felt it was a good compromise to soften the stiff pose to pose look.

The script helped massively but like most simulations, the result needed some additional work to art direct the result and get the tail to resolve in Messy’s question mark trademark posing.

6 years later, I am still mesmerized by the tail animation and if you are curious enough and browse other animators showreels, you will quickly see the difference with shots where no simulation was used.

Don’t forget to read this article about David Gibson’s fantastic use of deformers on the first opus of Sony’s “Cloudy with a chance of Meatballs”.

http://www.olivier-ladeuix.com/blog/2009/10/02/cloudy-with-a-chance-of-eyeballs/

Thanks for reading.

Pixar Brave Wireframes 4

Pixar Brave Wireframes

Ever wondered how dense those Pixar meshes are? I have!

You are in luck, Pixar just released some video footage where we can see the wireframe mesh of both Queen Elinor and King Fergus!

Except the helmet, hair and moustache the mesh is pretty dense. I wonder whether they add one more pass of smoothing at render time though.

Those are probably not the low poly meshes anyway but we can already notice an E pole on the cheeks. This could possibly means Pixar doesn’t use Nurbs surfaces anymore.

Click to zoom in.

And here is the Behind the Scenes video with, 2 minutes into it,Β Animation Collaborativeβ€˜s Michal Makarewicz. (a great school to attend if you are in the San Francisco area or crazy enough to relocate for three month πŸ˜‰ )

http://www.youtube.com/watch?v=Tuw1_JCNBVs

via Keith Ribbons

Related posts:
3d modeling portfolio
Low polygon modeling
Brave concept art and teaser

Low polygon modeling 6

Low polygon modeling

Low polygon modelling, opposed to “high frequency modeling” (the stuff done in Zbrush or Mudbox), is the basics of modelling. Any software can handle that type of work nowadays, from the free Blender to the extremely expensive Maya, 3dsmax or XSI packages.

There are two approaches to low polygon modeling:

1. A top-down approach where you start directly with a square plane whose edges you extrude following the final edge loops.

2. A bottom-up approach where you start modeling from a cube that you gradually subdivide by adding edges or extruding faces.

Both techniques are so simple that they only require a subdivide toggling hotkey (3 in Maya) and a handful of tools which I featured in my ‘Low Polygon modeling tools’ post.

The Edge extrusion method was extensively demonstrated by Kolby Jukes back in the days he used XSI as his primary modeling software. All his videos are offline as he only does Mudbox “High frequency sculpting” nowadays but the Edge extrusion technique is the technique I featured in my latest modeling timelaps video based on Brave’s Lord Macintosh character so have a look at this:

[vimeo]http://vimeo.com/25620952[/vimeo]

If you are not familiar with modeling, what I did here was to put the original concept art on a plane in the background then create a second smaller plane whose edges I extruded following an edge flow mental picture I had. The edge flow being the minimum amount of flowing edges necessary to describe the muscles, skeletal structure or deformation of the surface. Whaooo that was complicated! Well instead of just projecting a grid of edges on the surface of the head, I am creating a minimal amount of edge loops and rings that follow the creases facial expressions will produce. Makes sense?

Bay Raitt was probably the first one to fully demonstrate the Cube approach in that ground breaking 1999 “One afternoon with Bay Raitt” Mirai timelapse video.

This is the one I used in my Rickshaw modeling timelapse video:

[vimeo]http://vimeo.com/6857488[/vimeo]

[vimeo]http://vimeo.com/6825067[/vimeo]

I think the video is self explanatory, if not, post a comment and I will add more explanation in my post

Related posts:
Pixar “Brave” concept art and teaser
Jason Schleifer interview – Speaking of animation
Posts in the Modeling category

“This is what you need”, blocking 2

“This is what you need”, blocking

Here is the blocking for my “This is what you need” shot. I also shot some new video reference footage for Anakin as the previous video wasn’t very strong or interesting.

I am incorporating Blender more and more to my workflow as it has some amazing tools really suited to the Animation pipeline. Here I am able to write some notes on the video reference to single out some elements of interest. Other people like Jeff Gabor would edit their video reference in Premiere but I find it simpler and cheaper to use the Grease Pencil keys in Blender’s Dope Sheet editor.

New video reference, no sound (yep I am a cartoon but you knew that already):

Blocking:

The box at the beginning is a placeholder for the boxed Darth Vader outfit. I might add 12 frames at the very beginning it just so the first cut doesn’t come so early. I ran out of time and didn’t manage to fully flesh out Anakin or even the facial poses but with the help of the video reference, I think we know exactly what I am aiming for.

Related posts:
“This is what you need”, planning
“This is what you need’, gathering references
Blender
Jeff Gabor webcast recording online